
Is your car making strange squealing noises, or have you noticed issues with your power steering or air conditioning? The culprit might be a worn-out serpentine belt. This single, long belt powers many of your vehicle’s critical accessories, and when it fails, it can leave you stranded—or at least frustrated. Fortunately, replacing it yourself is a manageable DIY task with the right guidance. In this article, we’ll walk you through eight clear steps to go from struggling with a failing belt to driving confidently with a new one in place.
1. Recognize the Signs of a Failing Serpentine Belt
Before you grab your tools, you need to know if your serpentine belt is the problem. A failing belt can cause a cascade of issues, but spotting the signs early can save you time and money.
Why It Matters
The serpentine belt drives components like the alternator, water pump, and power steering pump. If it snaps or slips, you could lose power to these systems, leading to a dead battery, overheating, or difficulty steering. Addressing it promptly keeps your car reliable.
Common Symptoms
Look out for these telltale signs:
- Squealing or chirping noises from under the hood, especially when starting the engine or turning.
- Visible wear, like cracks, fraying, or a shiny, glazed surface on the belt.
- Accessory failures, such as dimming lights (alternator), overheating (water pump), or stiff steering.
When to Act
If the belt is cracked or making loud noises, replace it as soon as possible. Minor wear might let you plan the repair for a weekend, but don’t wait too long—better safe than stranded.
2. Gather the Necessary Tools and Materials
Preparation is key to a smooth replacement. Having everything ready means you won’t be stuck mid-job searching for a missing wrench.
Essential Tools
You’ll need:
- A wrench or ratchet (size depends on your tensioner—usually 13mm or 14mm).
- A socket set for any bolts or pulley adjustments.
- A belt tensioner tool (optional but helpful for some vehicles).
- A flathead screwdriver for prying or leverage, if needed.
Replacement Belt
Check your owner’s manual or the old belt’s part number to get the exact size and type. Auto parts stores can match it using your car’s make, model, and year. Bring the old belt with you to compare length and rib count.
Safety Gear
Wear gloves to protect your hands and safety glasses to shield your eyes from debris. Work in a well-lit area, like a garage or driveway, to see what you’re doing.
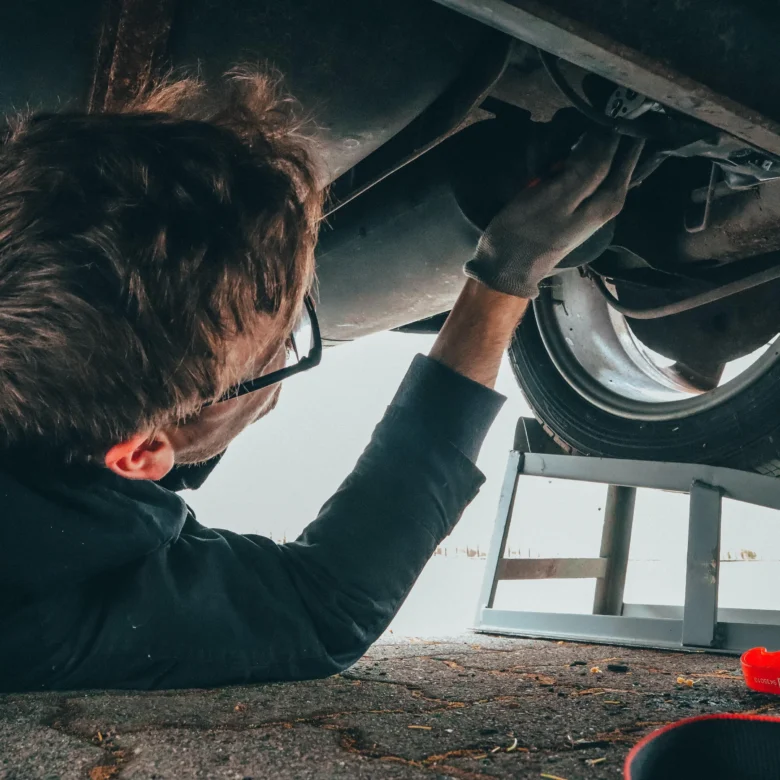
3. Prepare Your Vehicle for the Replacement
A little prep goes a long way toward a safe and efficient repair. Set up your car properly before diving in.
Park and Cool Down
Park on a flat surface and engage the parking brake. Let the engine cool for at least 30 minutes—hot components can burn you or make parts harder to handle.
Disconnect the Battery
For safety, disconnect the negative (-) battery terminal using a wrench. This prevents accidental electrical shorts while you work near the alternator or other powered components.
Locate the Belt Routing Diagram
Find the diagram showing how the belt wraps around the pulleys. It’s often on a sticker under the hood, in the owner’s manual, or online for your specific vehicle. Snap a photo or sketch it—this will be your lifeline when installing the new belt.
4. Inspect and Assess the Serpentine Belt System
Before removing anything, take a close look at the belt and its surroundings. This step helps you confirm the problem and spot any related issues.
Visual Inspection
Examine the belt for:
- Cracks or splits on the ribbed side.
- Fraying edges or missing chunks.
- Glazing (a shiny, polished look from slippage).
Check Tensioner and Pulleys
Wiggle the tensioner pulley by hand—excessive play or grinding noises mean it might need replacing too. Spin the idler pulleys; they should turn smoothly without wobbling. Misaligned or seized pulleys can ruin a new belt fast.
Take Notes or Photos
Snap a few pictures of the belt’s path and pulley setup. These will help you remember the routing and spot any differences after installation.
5. Release Tension and Remove the Old Belt
Now it’s time to take off the old belt. This step requires a bit of muscle but is straightforward once you know how.
Locate the Tensioner
The tensioner is a spring-loaded pulley that keeps the belt tight. It’s usually marked in the routing diagram or has a square hole for a ratchet. Find it before you start turning anything.
Relieve Tension
Attach your wrench or tensioner tool to the tensioner bolt (or square hole). Slowly turn it—usually clockwise—to release the spring tension. Hold it there; the belt will slacken. Be careful—it’s under pressure and can snap back.
Remove the Belt
With the tension off, slide the belt off one pulley, then let the tensioner ease back. Work the belt free from the other pulleys and pull it out of the engine bay. Set it aside for comparison later.
6. Install the New Serpentine Belt
With the old belt out, you’re ready to put the new one in. This is where your routing diagram (and patience) pays off.
Compare Old and New Belts
Hold the new belt next to the old one. They should match in length and have the same number of ribs (grooves). If they don’t, you’ve got the wrong part—swap it before proceeding.
Route the Belt
Follow your diagram or photos to thread the new belt over the pulleys. Start with the crankshaft pulley (bottom) and work your way around, saving the tensioner pulley for last. Leave some slack to reach it.
Apply Tension
Use your wrench to pull the tensioner back again. Slip the belt over the tensioner pulley, then slowly release the tool. The tensioner will tighten the belt automatically. Tug the belt gently—it should feel snug, not loose.
7. Verify Proper Installation and Function
Don’t celebrate yet—make sure everything’s working before you hit the road.
Double-Check Alignment
Look at each pulley. The belt should sit evenly in the grooves, not riding up or hanging off the edge. Adjust if needed by loosening the tension and repositioning.
Manual Rotation
If your car allows (check the manual), turn the engine by hand using a wrench on the crankshaft pulley bolt. Rotate it a few times—smooth movement means the belt’s on right. Stop if you feel resistance.
Start the Engine
Reconnect the battery, then start the car. Listen for squeaks or rattles. Let it idle for a minute, then rev the engine slightly. Everything should run quietly and smoothly.
8. Perform Post-Replacement Maintenance and Checks
You’re almost done! Wrap up the job and keep an eye on your work to ensure long-term success.
Clean Up
Put away your tools, dispose of the old belt, and wipe down any greasy spots on the engine. A tidy workspace prevents future headaches.
Monitor Performance
Take a short test drive. Listen for unusual noises and check accessory functions (steering, AC, charging). Over the next few days, keep an ear out for anything odd.
Know When to Seek Help
If you hear squealing, notice slippage, or suspect pulley issues, don’t ignore it. A mechanic can diagnose deeper problems like a failing tensioner or misalignment.
Conclusion
Replacing your car’s serpentine belt might seem daunting, but with the right tools and these eight steps, you’ve gone from wrestling with a failing belt to mastering a key repair. You’ve saved money, gained confidence, and kept your car running smoothly. Next time you hear that telltale squeal, you’ll know exactly what to do. Happy driving!


