Your car’s alternator is like its heartbeat, quietly generating electricity to keep the battery charged and power all the electrical goodies—headlights, radio, even your phone charger. When it starts failing, you might see dim lights, hear odd noises, or find yourself with a dead battery. Don’t panic! Testing and replacing it yourself is totally doable, even if you’re new to car fixes. You’ll save hundreds compared to a shop visit (they often charge $300-$500), plus you’ll feel like a pro when you’re done.
This guide breaks it all down into simple, detailed steps. First, we’ll test the alternator to confirm it’s the issue—better to be sure before you buy a new one. Then, we’ll walk you through swapping it out, explaining every move so you know why you’re doing it and how to do it right. Grab your tools, and let’s get your car back to full power!
Why Your Alternator Is a Big Deal
Imagine your car’s electrical system as a team effort: the battery starts the engine, but the alternator keeps everything running. It’s a small, spinning generator driven by a belt connected to the engine. As you drive, it pumps out electricity to recharge the battery and run things like the AC or windshield wipers. If it fails, your battery drains fast—like a phone with no charger—and eventually, your car won’t start or run properly. Testing it first pinpoints the problem, and replacing it yourself means you’re in charge of the fix, not some pricey mechanic.
When Should You Check Your Alternator?
Alternators are tough, often lasting 7-10 years or 100,000-150,000 miles, but they’re not invincible. Heat, heavy electrical use (think blasting the stereo), or lots of short trips can wear them out faster. Here’s when to test it:
-
- Dim or Flickering Lights: The alternator might not be supplying enough juice.
-
- Battery Warning Light: That little battery icon on your dash often means alternator trouble, not just a bad battery.
-
- Funny Noises: Whining or grinding from the engine bay could signal worn-out alternator bearings.
-
- Dead Battery: If it’s new but keeps dying, the alternator might not be charging it.
Even if you don’t see these signs, checking every couple of years—or when you replace a battery—keeps you ahead of trouble. It’s a quick DIY task that can save you a breakdown.
What You’ll Need for This DIY Job
Having the right stuff ready makes this project smoother and safer. Here’s what to grab, with a little explanation for each.
For Testing the Alternator
-
- Multimeter: This handheld gadget measures voltage—think of it as a doctor checking your car’s pulse. A cheap one ($10-$20) works fine for this.
-
- Gloves: Keeps your hands clean from grease and safe from battery acid or sparks.
-
- Safety Glasses: Protects your eyes from unexpected splashes or debris—better safe than sorry.
For Replacing the Alternator
-
- New Alternator: Must match your car’s make, model, year, and engine type. Your owner’s manual or an auto parts clerk can confirm. It’s the star of the show!
-
- Wrench Set: For loosening bolts—sizes vary (10mm-17mm are common). These are your basic twisting tools.
-
- Socket Set with Ratchet: Perfect for tight spots and faster work than a wrench—bring multiple sizes to be ready.
-
- Serpentine Belt Tool or Wrench: Loosens the belt tensioner (often 13mm or 15mm). It’s like a magic key for belt removal.
-
- Screwdriver: Flathead or Phillips, depending on your car’s battery clamps or covers—good for prying or unscrewing.
-
- Jack and Jack Stands: Lifts the car if you need under-access. Stands keep it stable—jacks alone aren’t safe for working underneath.
-
- Gloves and Safety Glasses: Again, for protection—grease, bolts, and belts can be messy or unpredictable.
-
- Rags: Wipes up spills or dirt—keeps your workspace tidy.
-
- Pen and Paper: To sketch the belt’s path—trust me, you’ll thank yourself later.
Optional Extras:
-
- Battery charger (revives a weak battery for testing).
-
- Torque wrench (tightens bolts exactly right—check your manual for specs).
Part 1: DIY Steps to Test Your Alternator
Before you rip out the alternator, let’s test it to make sure it’s really the problem. This takes 15-20 minutes and saves you from swapping a part that’s still good. Here’s how, with extra detail for clarity.
Step 1: Get Your Car Ready
-
- Why: You need a steady surface and safe conditions.
-
- How: Park on flat ground so the battery and alternator readings aren’t skewed. Turn off the engine—testing starts with it off. Pop the hood and prop it open with the rod or latch. Put on gloves and safety glasses—electricity and moving parts demand caution.
Step 2: Check the Battery First
-
- Why: A bad battery can trick you into thinking the alternator’s shot, so rule it out.
-
- How: Grab your multimeter and set it to DC voltage (20V range—most car batteries are 12V). Find the battery (usually under the hood, sometimes in the trunk). Touch the red probe to the positive (+) terminal (marked with a plus) and the black probe to the negative (-) terminal. Read the display:
-
- 12.4-12.6V: Battery’s healthy and charged—move to the next step.
-
- Below 12V: It’s weak—charge it with a charger or replace it, then retest later. A dead battery doesn’t mean the alternator’s bad yet.
-
- How: Grab your multimeter and set it to DC voltage (20V range—most car batteries are 12V). Find the battery (usually under the hood, sometimes in the trunk). Touch the red probe to the positive (+) terminal (marked with a plus) and the black probe to the negative (-) terminal. Read the display:
Step 3: Test the Alternator at Idle
-
- Why: This checks if it’s charging the battery when the engine’s running.
-
- How: Start the car and let it idle (just running, not revving). Keep the multimeter on DC voltage. Touch the probes to the battery terminals again—red to +, black to -. Watch the reading:
-
- 13.8-14.4V: Perfect! The alternator’s doing its job, pushing extra power to the battery.
-
- Below 13.8V: Too low—it’s not charging enough, a sign of failure.
-
- Above 14.4V: Too high—it’s overcharging, which can fry the battery or electronics.
-
- How: Start the car and let it idle (just running, not revving). Keep the multimeter on DC voltage. Touch the probes to the battery terminals again—red to +, black to -. Watch the reading:
-
- Leave the engine running for the next test.
Step 4: Load Test the Alternator
-
- Why: This pushes the alternator to see if it can handle real-world demands.
-
- How: With the engine still idling, turn on everything electrical—headlights (high beams), AC (max), radio, wipers. Back to the battery with your multimeter—same probe setup. Check the voltage:
-
- 13.8-14.4V: Holds steady? Great, it’s strong.
-
- Drops Below 13V: Struggling under load—likely failing.
-
- How: With the engine still idling, turn on everything electrical—headlights (high beams), AC (max), radio, wipers. Back to the battery with your multimeter—same probe setup. Check the voltage:
-
- This mimics driving with all your gadgets on, showing if the alternator’s up to par.
Step 5: Listen and Inspect
-
- Why: Physical clues can confirm electrical tests.
-
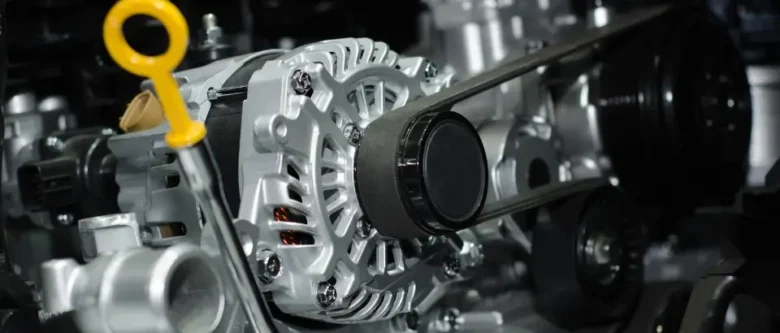
- How: Turn off the engine. Stand near the alternator (front of the engine, belt-driven—check your manual if unsure). Start it again briefly—hear whining (like a high-pitched hum) or grinding (like metal scraping)? That’s bad bearings or internals breaking down. Look at the serpentine belt too—loose, cracked, or slipping? A bad belt can mimic alternator issues, so fix that first if it’s the culprit.
Step 6: Make Your Call
-
- Why: You need to know if it’s time to replace or troubleshoot elsewhere.
-
- How: Good voltage (13.8-14.4V), no noise, solid belt? Alternator’s fine—check wiring or the battery instead. Low voltage, weird sounds, or belt’s okay? It’s replacement time—on to Part 2!
Part 2: DIY Steps to Replace Your Alternator
Testing says it’s kaput? Let’s swap it out. This takes 1-2 hours, depending on your car’s layout and your pace. Here’s every step, explained fully.
Step 1: Prep Your Supplies
-
- Why: Having the right stuff avoids mid-job trips to the store.
-
- How: Confirm your new alternator matches your car—check the manual or box. Gather all tools listed—wrench set, sockets, belt tool, etc. Park on a flat spot, set the parking brake, and turn off the ignition. You’re ready!
Step 2: Disconnect the Battery
-
- Why: Live power risks shocks or shorts—cutting it off is non-negotiable.
-
- How: Find the battery. Use a wrench (often 10mm) to loosen the negative (-) terminal clamp first—turn counterclockwise, pull it off, and tuck it away from the post. Then do the positive (+) terminal. No power flows now—safe to work.
Step 3: Lift the Car (If Needed)
-
- Why: Some alternators hide underneath or need clearance—check your car’s setup.
-
- How: If it’s tight from the top, jack up the front—slide the jack under a frame point (manual shows where), lift, and set jack stands under solid spots. Never crawl under with just a jack—it can collapse. Ramps work too—just drive up carefully.
Step 4: Loosen the Serpentine Belt
-
- Why: The belt drives the alternator—you’ve got to free it to remove the unit.
-
- How: Locate the alternator—boxy, with a pulley, near the engine’s front. The serpentine belt loops around it and other pulleys. Sketch its path (or snap a phone pic)—it’s a puzzle you’ll reassemble later. Find the tensioner pulley (spring-loaded, moves when pushed). Use a wrench or belt tool on its bolt (often 13mm or 15mm), turn counterclockwise to slack the belt, and slip it off the alternator pulley. Let it hang—you don’t need to remove it fully.
Step 5: Remove the Old Alternator
-
- Why: Out with the old to make room for the new!
-
- How: Look at the alternator’s connections—two main ones:
-
- Plug: A plastic connector—squeeze its tab and pull gently to unplug.
-
- Bolted Wire: A nut holds a thick wire (often 10mm)—unscrew it and lift the wire off.
-
- How: Look at the alternator’s connections—two main ones:
-
- Set these aside safely. Now the mounting bolts—usually 2-3, sizes like 13mm or 15mm. Use your socket set with ratchet, turning counterclockwise. They might be tight—brace yourself and twist steadily. Once loose, pull the alternator out. Stuck? Wiggle it or tap lightly with a rubber mallet—don’t force it and dent anything.
Step 6: Install the New Alternator
-
- Why: A fresh unit restores your car’s power system.
-
- How: Hold the new alternator next to the old—same shape, holes, pulley? Good match. Slide it into the mounting spot—line up the bolt holes. Hand-thread the bolts to start, then tighten with your socket set—snug, not gorilla-tight. If you’ve got a torque wrench, use your manual’s specs (e.g., 20-35 ft-lbs). Reconnect:
-
- Wire: Bolt it back, tighten the nut firmly.
-
- Plug: Push until it clicks—give it a tug to ensure it’s locked.
-
- How: Hold the new alternator next to the old—same shape, holes, pulley? Good match. Slide it into the mounting spot—line up the bolt holes. Hand-thread the bolts to start, then tighten with your socket set—snug, not gorilla-tight. If you’ve got a torque wrench, use your manual’s specs (e.g., 20-35 ft-lbs). Reconnect:
Step 7: Reattach the Serpentine Belt
-
- Why: Without it, the alternator won’t spin—gotta get it back on right.
-
- How: Use your sketch or pic—it shows how the belt snakes around pulleys. Turn the tensioner again (counterclockwise), slip the belt over the alternator pulley, and release slowly. Check every groove—it should sit flat and tight, not twisted or loose. A misfit belt can snap or slip off.
Step 8: Lower the Car (If Lifted)
-
- Why: Time to get it back on all fours for testing.
-
- How: If jacked, use the jack to lift slightly, pull out the stands, and lower it gently to the ground. Double-check nothing’s underneath.
Step 9: Reconnect the Battery
-
- Why: Restores power to test your work.
-
- How: Reverse Step 2—positive (+) terminal first, tighten the clamp (clockwise). Then the negative (-) terminal—snug it up. Both should feel solid—no wobble means no loose connections.
Step 10: Test Your New Alternator
-
- Why: Confirms you did it right—no point driving with a dud fix.
-
- How: Start the engine—listen for smooth running, no grinding or squeals. Grab your multimeter, set to DC voltage, and check the battery at idle: 13.8-14.4V is the sweet spot. Turn on lights, AC, radio—voltage holds? Awesome. Dash warning light off? You’re a champ!
Step 11: Wrap Up Cleanly
-
- Why: A tidy finish keeps your garage and conscience clear.
-
- How: Wipe tools and spills with rags. Take the old alternator back to the store—most give a “core” refund ($10-$20). Pat yourself on the back—you earned it!
DIY Tips for a Smooth Job
-
- Label Wires: Tape and mark connections if they’re confusing—saves guesswork.
-
- Photo Backup: Snap pics of the belt and alternator setup—memory aids rock.
-
- Tighten Smart: Too loose flops, too tight strips—aim for firm.
-
- Battery Boost: Weak battery? Charge it first for a fair test.
-
- Save Cash: Rebuilt alternators work great and cost less—ask about them.
DIY Mistakes to Watch Out For
-
- Blind Swap: Testing first avoids replacing a good part—don’t skip it.
-
- Hot Battery: Disconnect it—sparks or shorts ruin your day.
-
- Belt Blunder: Wrong routing wrecks pulleys—use that sketch.
-
- Slack Bolts: Loose stuff vibrates off—check twice.
-
- Mismatched Part: Wrong alternator = no fit—verify it’s yours.
DIY Troubleshooting If It’s Off
-
- No Charge Still: Recheck wires, bolts—new part might be faulty (rare but happens).
-
- Noise Persists: Belt too tight or pulley off-kilter—loosen and realign.
-
- Light Stays On: Fuse or wiring glitch—dig deeper or ask a pro.
You Did It—Take a Victory Lap!
Testing and replacing your alternator is a DIY triumph that keeps your car alive and your skills sharp. Start with the test—it’s a low-stakes way to learn your car’s pulse. When replacement time hits, follow these steps, take your time, and enjoy the win. You’ve just saved cash and powered up your ride—nice work!