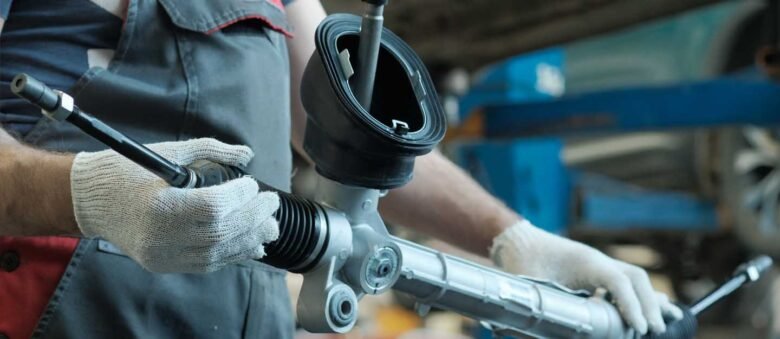
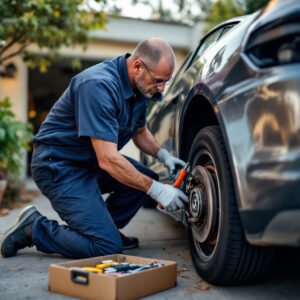
Your car’s steering rack is the heart of its steering system, translating your wheel turns into smooth, precise wheel movement. When it starts to fail, you might feel loose or stiff steering, hear clunking noises, or even spot power steering fluid leaks—issues that affect both comfort and safety. Replacing a steering rack might sound intimidating, but with basic tools and some patience, you can tackle this job at home and save $500–$1,000 compared to a mechanic’s bill. In this 2000+ word guide, I’ll walk you through every step of checking and replacing your steering rack, with detailed explanations to make the process clear and doable. By the end, you’ll have a renewed steering system and the satisfaction of a major DIY win.
Why the Steering Rack Matters
The steering rack (or rack-and-pinion system) is a long metal bar with a pinion gear that connects your steering wheel to the front wheels via tie rods. When you turn the wheel, the pinion moves the rack side to side, steering the car. Most modern cars have power steering racks with hydraulic or electric assist to make turning easier. Over time (often 100,000+ miles), seals wear out, gears get sloppy, or fluid lines fail, leading to:
-
- Loose Steering: Too much play or a wandering feel.
-
- Stiffness: Hard to turn, especially at low speeds.
-
- Noises: Clunks or groans when turning.
-
- Leaks: Power steering fluid puddles under your car.
Fixing it yourself restores control, prevents bigger damage (like tire wear), and keeps cash in your pocket. Let’s get to it!
Tools and Materials You’ll Need
You don’t need a pro mechanic’s setup—just common tools and the right parts. Here’s a detailed list with explanations:
-
- Jack and Jack Stands: A floor jack lifts the car; stands keep it secure. Safety first—never work under a car held only by a jack.
-
- Lug Wrench: Removes wheel lug nuts—your car’s spare tire kit likely has one (a four-way wrench offers great leverage).
-
- Socket Wrench Set: Various sizes (e.g., 10mm, 13mm, 17mm, 19mm) for bolts—check if your car uses metric or imperial.
-
- Open-End Wrenches: Pair with sockets to hold bolts while turning nuts, especially in tight spots.
-
- Tie Rod Puller or Pickle Fork: Separates tie rod ends from the steering knuckle—rentable or $10–$20 to buy.
-
- Pliers: For cotter pins or clips on tie rod nuts.
-
- Penetrating Oil (e.g., WD-40 or PB Blaster): Loosens rusted bolts—a must for older cars.
-
- Torque Wrench: Tightens bolts to exact specs (e.g., 50 ft-lbs)—borrow one if you don’t own it.
-
- Screwdrivers (Flathead and Phillips): For clips, hoses, or prying small parts.
-
- Hammer: A 3–5 lb sledge or ball-peen to tap stuck components loose.
-
- Pry Bar: Extra leverage for stubborn parts.
-
- Drain Pan: Catches power steering fluid when disconnecting lines.
-
- Funnel and Power Steering Fluid: To refill the system (check your manual for the right type—e.g., ATF or specific fluid).
-
- Safety Gear: Gloves (grease is messy), safety glasses (rust flakes hurt), and sturdy shoes (dropped tools sting).
-
- New Steering Rack: Must match your car’s make, model, and year—power or manual, with or without assist (verify at a parts store).
-
- Replacement Hardware: New bolts, nuts, or clamps if the old ones are worn or not included.
-
- Shop Rags: For cleanup and fluid spills.
Optional but Helpful:
-
- Line Wrench: For power steering line fittings—prevents rounding them off (e.g., 13mm or 17mm flare nut wrench).
-
- Zip Ties: Secure hoses or lines during reassembly.
Cost? A new steering rack runs $100–$500 (remanufactured or new), plus $10–$20 for fluid. Compare that to a shop’s $500–$1,000+, and DIY looks pretty sweet.
Preparation: Setting Up for Success
Before you start, take these steps to ensure a smooth, safe job:
-
- Park on a Flat Surface: A level driveway or garage keeps the car stable. Engage the parking brake firmly and turn on hazard lights if near traffic.
-
- Gather Your Supplies: Lay out tools and parts where you can reach them. Confirm the steering rack matches your car—wrong parts mean delays.
-
- Check Your Manual: Your owner’s manual or a repair guide (Haynes or Chilton, available at auto stores) lists torque specs, fluid type, and model-specific tips. It’s your lifeline.
-
- Wear Safety Gear: Gloves keep your hands clean, glasses protect your eyes, and solid shoes save your toes. You’re ready to work safely now.
Step-by-Step Guide to Replacing Your Steering Rack
We’ll start by confirming the rack’s the issue, then replace it. This guide focuses on a front-wheel power steering rack (most common), but the process adapts to rear-wheel or manual racks with slight tweaks. Work one step at a time, and take breaks if needed.
Part 1: Check the Steering Rack
Before buying a new rack, make sure it’s the culprit:
Step 1: Inspect Symptoms
-
- Turn the Wheel: With the car off, turn the steering wheel side to side. Excessive play (more than 1–2 inches) or grinding suggests rack wear.
-
- Listen Up: Start the engine and turn slowly—clunks or whines point to the rack or pump.
-
- Look Underneath: Check for red or brown fluid leaks under the car (power steering fluid). A wet rack or dripping lines means seals are shot.
Step 2: Test on Jack Stands
-
- Lift the Front: Loosen lug nuts on both front wheels, jack up the front end (use frame lift points), and secure with stands under the frame.
-
- Wiggle Wheels: Grab each tire at 9 and 3 o’clock and shake side to side. Play here could be tie rods, but if steering feels sloppy too, it’s likely the rack.
-
- Decision: Leaks, noise, or looseness? Time to replace it. If it’s just tie rods, that’s a smaller job—check my other guide!
Part 2: Replace the Steering Rack
Rack’s bad? Here’s how to swap it out:
Step 3: Lift and Remove Wheels
-
- Loosen Lug Nuts: With the car on the ground, use your lug wrench to loosen both front wheels’ lug nuts half a turn.
-
- Jack Up: Position the jack under a front frame point, lift until both tires are off the ground, and secure with stands under the frame. Tug the car—it shouldn’t move.
-
- Remove Wheels: Unscrew lug nuts fully, pull off both front wheels, and set them aside flat.
Step 4: Disconnect Steering Components
-
- Drain Fluid: Place a drain pan under the steering rack. For power steering, loosen the return line (usually the softer hose) with a screwdriver or line wrench, letting fluid drip out. Plug the line with a rag to minimize mess.
-
- Remove Tie Rod Ends: Find the tie rods (rods from the rack to the knuckles). Remove cotter pins with pliers if present, loosen the castle nut with a socket wrench (e.g., 17mm), and leave it threaded a few turns. Use a tie rod puller or pickle fork—wedge it between the knuckle and tie rod, hammer until it pops loose, then remove the nut fully. Repeat for both sides.
-
- Detach Steering Shaft: Inside the car (under the dash) or engine bay, locate the steering shaft coupling to the rack’s pinion. Mark its position with chalk or tape (for alignment later), then remove the bolt (e.g., 13mm) with a socket wrench.
Step 5: Unbolt the Steering Rack
-
- Locate Mounts: Under the car, find the rack—usually a metal bar across the front subframe or firewall, held by 2–4 bolts or clamps. Spray them with penetrating oil and wait 5–10 minutes.
-
- Remove Fluid Lines: For power steering, use a line wrench (e.g., 13mm) to loosen fittings on the pressure and return lines. Let them drain into the pan, then plug or cap them to avoid spills.
-
- Unbolt It: Use your socket wrench (sizes vary—e.g., 17mm or 19mm) to remove the mounting bolts. Keep a pry bar handy—sometimes you need to nudge the rack free. Support it with your hand as the last bolt comes out—it’s heavy (10–20 lbs).
Step 6: Remove the Old Rack
-
- Wiggle It Out: Slide the rack out through one side of the engine bay or wheel well—space is tight, so twist and tilt as needed. Watch for snags on hoses or wires. Set it aside and compare it to the new one—length, mounts, and fittings should match.
Step 7: Install the New Steering Rack
-
- Position It: Slide the new rack into place, aligning the mounting holes. Hand-start the bolts to hold it loosely—don’t tighten yet.
-
- Reconnect Steering Shaft: Line up your chalk mark, slide the coupling onto the pinion, and tighten the bolt snugly (torque later).
-
- Attach Tie Rods: Insert each tie rod end into the knuckle, thread on the castle nut, and snug it. Add new cotter pins if included—bend the legs to lock them.
-
- Reconnect Fluid Lines: For power steering, attach the pressure and return lines to the rack’s fittings. Hand-tighten, then snug with a line wrench—don’t overtighten, as fittings can strip.
Step 8: Secure and Reassemble
-
- Tighten Rack Bolts: With the rack aligned, tighten the mounting bolts with your socket wrench—final torque comes later.
-
- Mount Wheels: Lift each wheel onto the hub, hand-tighten lug nuts, raise the car, remove stands, and lower it to the ground.
-
- Torque Everything: With the car’s weight on the wheels, use your torque wrench. Tighten rack bolts (e.g., 50–70 ft-lbs), tie rod nuts (e.g., 35–50 ft-lbs), steering shaft bolt (e.g., 20–30 ft-lbs), and lug nuts (80–120 ft-lbs in a star pattern). Check your manual for exact specs.
Step 9: Refill and Bleed the System
-
- Add Fluid: Open the power steering reservoir (engine bay, near the pump), use a funnel to pour in the right fluid (e.g., ATF or specific type—check your manual), and fill to the “cold” line.
-
- Bleed Air: Start the engine, turn the wheel lock-to-lock (full left to full right) 5–10 times slowly with the cap off. Watch for bubbles in the reservoir—top off fluid as needed until it’s steady. Cap it when done.
Step 10: Test and Inspect
-
- Check Steering: Turn the wheel with the car off—should feel smooth. Start it—should turn easily with no noise.
-
- Road Test: Drive a short loop. Steering should feel tight and quiet, with no leaks or odd behavior.
-
- Final Look: Park, check under the car for fluid drips, and ensure all bolts are tight. Retorque if anything loosened.
Tips for a Smooth Job
-
- Mark Tie Rods: Count threads or mark their position with tape before removal—helps approximate alignment.
-
- Take Photos: Snap pics at each step—makes reassembly foolproof.
-
- Clean as You Go: Wipe mounts and lines—less mess now means easier fixes later.
-
- Alignment After: Rack replacement shifts wheel alignment—plan a pro alignment ($50–$100).
Troubleshooting
-
- Rack Won’t Fit: Check for obstructions or wrong part number.
-
- Steering Stiff: Air in the system—bleed more, or check pump/fluid level.
-
- Leaks Persist: Recheck line fittings—might need tightening or new seals.


