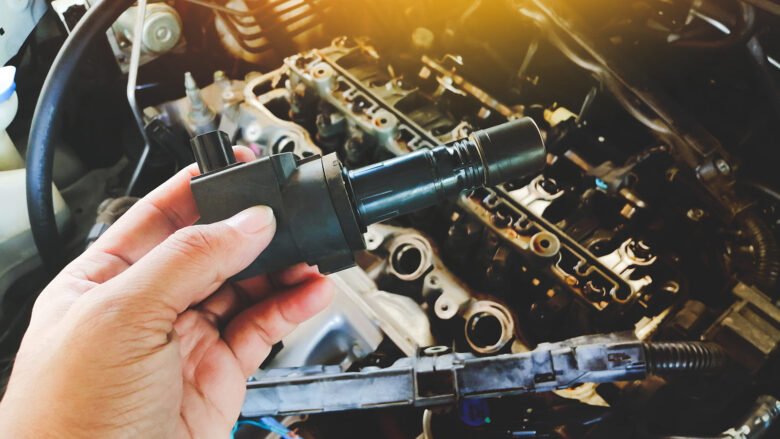
The ignition coil is the unsung hero of your vehicle’s ignition system, transforming the battery’s modest 12 volts into the thousands of volts needed to spark the fuel-air mixture in your engine’s cylinders. When an ignition coil fails, the consequences can range from annoying misfires and rough idling to a complete refusal to start—leaving you stranded and frustrated. The good news? Replacing a faulty ignition coil is a manageable DIY project for most car owners, requiring only basic tools, a little know-how, and a methodical approach.
In this comprehensive guide, we’ll take you through every step of the process—from diagnosing the problem to installing a new coil and testing your work. By the end, you’ll have the confidence to restore your engine’s performance and save a trip to the mechanic. Let’s get started.
Understanding the Ignition Coil’s Role
Before diving into the replacement process, it’s helpful to grasp what an ignition coil does and why it’s so critical. Essentially, the coil acts as a high-voltage transformer, amplifying the battery’s power to create a strong spark at the spark plug. This spark ignites the air-fuel mixture, driving the pistons and keeping your engine running. Modern vehicles often use a coil-on-plug (COP) system, with one coil per cylinder, while older models might rely on a single coil and distributor. A failing coil disrupts this process, leading to incomplete combustion and a cascade of performance issues. Recognizing the signs early and replacing the coil promptly can prevent further engine damage.
Tools and Materials Needed
Preparation is key to a smooth repair. Here’s a detailed list of everything you’ll need to replace an ignition coil:
-
- New Ignition Coil: Match it to your vehicle’s make, model, year, and engine type—check the owner’s manual or part retailer’s compatibility chart. OEM (original equipment manufacturer) coils ensure reliability, but quality aftermarket options can work too.
-
- Socket Wrench Set: Include extensions and adapters (e.g., ¼-inch or ⅜-inch drive) to reach bolts in tight engine bays. Common sizes like 10mm or 8mm are often needed.
-
- Screwdrivers: A flathead and Phillips screwdriver handle various fasteners—keep multiple sizes on hand for versatility.
-
- Torque Wrench: Optional but recommended for precision tightening. Over-tightening can crack the coil’s housing; under-tightening risks vibration damage. Check your manual for torque specs (typically 5-10 Nm).
-
- Dielectric Grease: A small tube improves electrical connections and seals out moisture, reducing the risk of future misfires.
-
- Protective Gloves and Safety Glasses: Gloves shield your hands from sharp edges and grime; glasses protect your eyes from debris or accidental sparks.
-
- Vehicle Service Manual: This goldmine of model-specific info details coil locations, bolt sizes, and torque values—worth having nearby.
-
- OBD-II Scanner: Essential for reading diagnostic trouble codes (DTCs) to pinpoint the faulty coil and clear codes post-repair.
Set up your tools in a well-lit, organized workspace—preferably a garage or shaded driveway—to keep everything within reach and avoid losing small parts.
Step 1: Diagnosing a Faulty Ignition Coil
Replacing a coil without confirming it’s the problem wastes time and money. Here’s how to diagnose a faulty ignition coil with confidence.
Common Symptoms
Watch for these telltale signs:
-
- Check Engine Light (CEL): A glowing CEL often signals ignition trouble. Codes like P0351-P0356 (e.g., “Ignition Coil A Primary/Secondary Circuit Malfunction”) point directly to a specific coil.
-
- Engine Misfires or Stalling: Hesitation or sputtering during acceleration suggests a weak or absent spark. You might feel a “hiccup” in power delivery.
-
- Rough Idling: Excessive vibration, uneven engine noise, or a shaky steering wheel at idle indicate inconsistent combustion.
-
- Reduced Fuel Efficiency: Incomplete burns mean more fuel gets wasted—your MPG might drop noticeably.
-
- Car Won’t Start: If the coil fails completely, no spark means no combustion, leaving the engine dead.
-
- Backfiring or Exhaust Smoke: Unburned fuel can ignite in the exhaust, causing loud pops or black smoke from the tailpipe.
Using an OBD-II Scanner
Plug the scanner into your car’s OBD-II port (usually under the dashboard) with the ignition on but engine off. Retrieve the codes and note any coil-related ones. If unsure which cylinder corresponds to the code (e.g., P0352 = Coil B), your manual or an online resource can map it out.
Manual Testing (Optional)
If you lack a scanner, try this: with the engine running (and cooled), unplug one coil’s electrical connector at a time. If the engine’s behavior doesn’t change, that coil is likely dead. Reconnect it and move to the next. Caution: wear gloves and avoid touching live wires.
Once you’ve confirmed the culprit, proceed with the replacement.
Step 2: Preparing for the Replacement
Safety and setup are critical before you touch the engine.
Park on a Level Surface
Choose a flat spot to park—slopes risk the car rolling, especially once you’re under the hood. Engage the parking brake firmly. For extra security, place wheel chocks or a brick behind a tire.
Turn Off the Engine and Cool Down
Ignition coils heat up during operation, often exceeding 150°F (65°C). After driving, wait at least 30 minutes—longer if it was a hot day or long trip. A cool engine prevents burns and makes components easier to handle.
Disconnect the Battery
Locate the battery (typically under the hood, sometimes in the trunk or under a seat). Use a socket or adjustable wrench to loosen the negative (-) terminal clamp—turn counterclockwise. Lift it off and secure it away from metal surfaces to break the circuit and eliminate shock risks.
Gather Your Tools
Lay out your tools and the new coil on a workbench or tarp. A magnetic tray or small containers keep bolts and connectors from disappearing into the engine bay’s depths.
Step 3: Locating the Ignition Coil
Finding the coil depends on your vehicle’s ignition system.
Types of Ignition Systems
-
- Coil-on-Plug (COP): Most modern cars use this—each cylinder has its own coil sitting atop the spark plug. Look for small, cylindrical units with wiring connectors on the engine’s valve cover.
-
- Distributor-Based: Older vehicles have one coil near the distributor, which sends sparks to each cylinder via wires. It’s often a single, larger unit.
-
- Coil Pack: Common in some 4- or 6-cylinder engines, a single pack with multiple outputs sits near the engine block, feeding several cylinders.
Finding It
Open the hood and scan the engine’s top. COP coils are usually in a row or staggered along the cylinder head. Coil packs might be offset to one side, while distributor coils are near the firewall or fender. Your manual’s diagram or a quick online search (e.g., “2005 Honda Civic ignition coil location”) can pinpoint it if you’re stumped.
Step 4: Removing the Faulty Ignition Coil
With the coil located, it’s time to take it out.
Remove Covering Components
Some engines have plastic covers or air intake assemblies hiding the coils. Unbolt these with a socket wrench—typically 10mm or 8mm bolts—and lift them off. Set them aside safely.
Identify the Faulty Coil
For COP systems, match the cylinder number from your OBD-II code (e.g., P0351 = Cylinder 1). If testing manually, mark the bad coil with chalk or tape. For coil packs or single coils, you’re removing the whole unit.
Unplug the Electrical Connector
Press the locking tab on the connector (usually a small plastic clip) and pull gently. If it resists, wiggle it side to side—don’t force it, or you’ll break the wiring.
Remove the Retaining Bolt
Use a socket wrench (often 10mm) to unscrew the bolt securing the coil. Turn counterclockwise and keep one hand under it to catch it—dropping it into the engine bay is a headache you don’t need. For coil packs, multiple bolts might hold it down.
Extract the Ignition Coil
Grip the coil by its body (not the connector) and pull straight up. COP coils slide off the spark plug; coil packs lift off their mount. If it’s snug, rock it gently—excessive twisting can tear the rubber boot or damage the spark plug below.
Step 5: Installing the New Ignition Coil
Now, let’s put the new coil in place.
Apply Dielectric Grease
Dab a pea-sized amount of dielectric grease inside the coil’s boot (the part that fits over the spark plug). This boosts conductivity, prevents corrosion, and eases future removal. Don’t overdo it—too much can attract dirt.
Insert the New Coil
Align the coil with the spark plug or mounting point. Push down firmly until it seats fully—you’ll feel a slight click or resistance. For coil packs, ensure all outputs align with their connectors.
Secure with the Retaining Bolt
Thread the bolt back in by hand to avoid cross-threading, then tighten with a socket wrench. If using a torque wrench, follow your manual’s specs (e.g., 7 Nm). Snug is good—over-tightening cracks plastic housings.
Reconnect the Electrical Connector
Push the wiring plug into the coil until it clicks. Tug lightly to confirm it’s locked—loose connections cause misfires.
Reattach Covering Components
Replace any engine covers or intake parts you removed, securing them with their bolts. Double-check for forgotten tools or rags in the engine bay.
Step 6: Testing the New Ignition Coil
Time to see if your hard work paid off.
Reconnect the Battery
Reattach the negative terminal and tighten it securely—wobble means a bad connection.
Start the Engine
Turn the key or hit the start button. Let it idle for 2-3 minutes. A healthy engine sounds smooth—no stuttering or shaking. Roughness suggests a loose connection or another bad coil.
Check for Error Codes
Plug in your OBD-II scanner, clear old codes (e.g., P0351), and scan again. No new codes mean success. If one pops up, retrace your steps—check the connector and bolt tightness.
Test Drive the Car
Take a 5-10 minute drive. Start slow, then accelerate moderately. The car should feel responsive, with no hesitation or odd noises. Any issues? Pull over and inspect.
Step 7: Final Checks and Maintenance Tips
Wrap up with these finishing touches.
Inspect Other Coils
One failure might signal wear in others, especially on high-mileage cars (100,000+ miles). If budget allows, replace all COP coils at once to avoid repeat repairs.
Regularly Check Spark Plugs
Worn plugs overwork coils, shortening their lifespan. Pull one to inspect—blackened or eroded tips mean it’s time for new ones (every 30,000-60,000 miles, per your manual).
Keep the Engine Clean
Oil leaks or dirt buildup insulate heat, stressing coils. Wipe down the engine bay with a degreaser yearly, avoiding electronics.
Use High-Quality Fuel
Cheap gas can leave carbon deposits, fouling plugs and coils. Stick to top-tier brands for cleaner combustion.
Conclusion
Replacing a faulty ignition coil is a straightforward, cost-saving DIY fix that restores your car’s pep and reliability. Armed with this guide, you can diagnose the issue, swap out the bad coil, and test your work—all without a mechanic’s bill. Always cross-reference your vehicle’s manual for specifics, and don’t hesitate to seek pro help if something feels off. With basic tools and a steady hand, you’ll have your engine purring again in no time. Happy wrenching!


