Your car’s exterior takes a beating—door dings, stray pebbles, and errant shopping carts leave small scratches and dents that mar its look and value. A trip to the body shop can easily cost $200–$500 for minor fixes, but with basic tools, affordable materials, and a bit of elbow grease, you can tackle these blemishes yourself. This detailed guide breaks down the process into clear, actionable steps for repairing small scratches and dents, empowering you to restore your car’s shine without breaking the bank. From buffing out surface scratches to popping out shallow dents, you’ll learn pro-level techniques to make your vehicle look fresh off the lot.
How to Fix Small Scratches on Your Car
Scratches are inevitable, but not all require professional help. Here’s how to handle them, step by step.
Step 1: Identify the Type of Scratch
Understanding the scratch’s depth dictates your approach—fixing a surface mark is simpler than repairing one down to the metal.
1.1 Scratch Categories
-
- Clear Coat Scratches: Affect only the top protective layer—shallow and easy to buff out.
-
- Paint Scratches: Cut into the colored paint layer—deeper but manageable with touch-up.
-
- Primer Scratches: Reach the primer or bare metal—toughest, needing sanding and repainting.
1.2 How to Assess
-
- Run your fingernail gently over the scratch. If it glides without catching, it’s a clear coat scratch. If it snags, it’s deeper.
-
- Check under good light—shallow scratches may vanish at angles; deeper ones show color or metal.
1.3 Why It Matters
Misjudging depth can waste time (e.g., buffing a primer scratch) or damage paint (over-sanding a light mark).
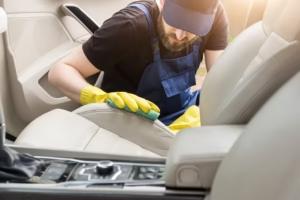
Step 2: Clean the Affected Area
A clean surface ensures your repair sticks and avoids grinding dirt into the paint.
2.1 Cleaning Steps
-
- Wash: Mix car-specific soap with water, scrub the area with a microfiber towel, and rinse—household soaps strip wax.
-
- Dry: Pat dry with a fresh microfiber towel—air-drying leaves water spots.
-
- Degrease: Wipe with isopropyl alcohol (70% or less) on a cloth to remove wax, grease, or oils—paint won’t adhere otherwise.
2.2 Pro Tip
Tape off the area with painter’s tape if it’s near trim or glass—keeps cleaner off unintended spots.
Step 3: Buff Out Minor Scratches (Clear Coat Scratches)
Light scratches in the clear coat often vanish with simple abrasion.
3.1 Buffing Process
-
- Apply Product: Dab a pea-sized amount of scratch remover or rubbing compound (e.g., Meguiar’s or 3M) onto a microfiber cloth—too much smears.
-
- Rub: Work in small, circular motions for 30–60 seconds with moderate pressure—let the compound do the work, not brute force.
-
- Wipe: Clean off residue with a dry cloth—check progress. Repeat if the scratch lingers.
-
- Polish: Finish with car wax or polish, applied with a foam pad, to restore gloss.
3.2 Why It Works
Rubbing compounds gently sand the clear coat, leveling it around the scratch—wax fills micro-abrasions for shine.
3.3 Caution
Over-buffing thins the clear coat—stop if the scratch doesn’t fade after two tries.
Step 4: Fix Deeper Scratches (Paint & Primer Scratches)
Deeper scratches need sanding, painting, and blending for a seamless fix.
4.1 Sand the Scratch
-
- Wet Sand: Soak 2000–3000 grit sandpaper in water, then sand lightly in one direction (not circles)—wetness reduces friction and dust.
-
- Check: Wipe with a damp cloth—sand until the scratch edges feel smooth, not jagged.
4.2 Apply Touch-Up Paint
-
- Match Color: Find your car’s paint code (inside driver’s door or manual), then buy matching touch-up paint or a paint pen.
-
- Layer: Use a fine brush or pen tip to apply thin coats—less is more. Let each dry 15–30 minutes (check product label)—2–3 layers usually suffice.
-
- Dry: Wait 24–48 hours for full curing—rushing risks smudging.
4.3 Smooth and Blend
-
- Wet Sand Again: Use 3000 grit sandpaper (wet) to feather the edges—blend new paint into old for a smooth transition.
-
- Polish: Rub polishing compound with a microfiber cloth to even the finish—work outward from the repair.
-
- Wax: Apply car wax with a foam applicator for shine and protection.
4.4 Why Patience Pays
Thin layers and drying time prevent clumping—hasty fixes look patchy and peel fast.
Step 5: Use a Clear Coat Spray for a Professional Finish
A clear coat adds durability and gloss to deeper repairs.
5.1 Application
-
- Spray: Hold a clear coat aerosol can 6–8 inches away—use short, even bursts, overlapping strokes slightly.
-
- Dry: Let it cure 24 hours—avoid touching or waxing until fully hard.
5.2 Optional Step
Skip if the scratch was minor—clear coat is overkill for buffed clear coat scratches but vital for primer-level fixes.
Step 6: Prevent Future Scratches
Keep your repair lasting with proactive care.
6.1 Prevention Tips
-
- Park Smart: Choose wide spaces or end spots to dodge door dings—avoid tight lots.
-
- Wax Regularly: Apply wax every 3 months—it’s a barrier against light abrasions.
-
- Cover Up: Use a breathable car cover outdoors—blocks UV and debris.
6.2 Why It Helps
Prevention cuts repair frequency—wax alone can deflect minor scuffs.
How to Fix Small Dents on Your Car
Dents range from shallow dimples to deeper craters—here’s how to tackle the small ones DIY-style.
Step 1: Assess the Dent
Size and condition guide your method.
1.1 What to Look For
-
- Size: Small (under 6 inches) and shallow dents are DIY-friendly—larger ones need pros.
-
- Paint Damage: No cracks or chips? Easier fix. Paint damage adds a touch-up step.
-
- Access: Can you reach behind the panel (e.g., hood or trunk)? Internal pushing works best.
1.2 Why Assess?
The wrong technique (e.g., heat on a painted dent) can worsen damage—know your dent first.
Step 2: Use the Boiling Water Method (For Plastic Bumpers)
Plastic flexes with heat—perfect for bumper dents.
2.1 Steps
-
- Heat: Boil water, pour it slowly over the dent—focus on the center to soften plastic.
-
- Push: Reach behind (wear gloves—hot!) and press outward firmly but gently.
-
- Cool: Splash cold water to set the shape—plastic hardens fast.
2.2 Why It Works
Heat makes plastic pliable; cold locks it back—simple physics, no tools.
Step 3: Use a Plunger for Shallow Dents
Suction works wonders on flat, shallow dents.
3.1 Process
-
- Wet: Dampen the plunger and dent with water—boosts suction.
-
- Pull: Center the plunger over the dent, push in, then pull out sharply—like unclogging a drain. Repeat 2–3 times.
-
- Check: Wipe dry—if it’s still dented, try a stronger pull.
3.2 Best For
Metal panels with smooth surfaces—won’t work on creases or edges.
Step 4: Try a Hair Dryer and Compressed Air
Temperature swings pop metal dents.
4.1 Method
-
- Heat: Blast the dent with a hairdryer (high heat) for 1–2 minutes—metal expands.
-
- Cool: Flip a compressed air can upside down (liquid CO2 sprays out), hit the dent for 10–15 seconds—rapid cooling contracts it.
-
- Pop: The shift should lift the dent—repeat if partial.
4.2 Safety Note
Wear gloves and goggles—cold spray can burn skin.
Step 5: Use a Dent Puller (For Larger Dents)
Suction tools handle slightly bigger dents.
5.1 How to Use
-
- Buy: Get a suction dent puller (e.g., $20 at auto stores)—look for a cup with a handle or screw mechanism.
-
- Apply: Center it on the dent, press to seal, and pull steadily—firm, not jerky.
-
- Smooth: If minor imperfections remain, buff with polishing compound.
5.2 Limits
Works best on flat panels—curved or creased dents resist suction.
Step 6: Tap Out the Dent (For Accessible Panels)
Manual pressure fixes dents from the inside.
6.1 Tapping Steps
-
- Access: Open the hood, trunk, or remove trim to reach behind—check your manual for panel access.
-
- Protect: Lay a cloth over the dent outside—cushions taps and prevents scratches.
-
- Tap: Use a rubber mallet or gloved hand to gently push or tap outward—start light, increase as needed.
6.2 Why Gentle?
Hard hits deform metal further—patience flattens without warping.
Step 7: Use Body Filler for Deep Dents
When dents won’t pop, fill them.
7.1 Filler Process
-
- Sand: Rough up the dent with 120-grit sandpaper—filler grips better.
-
- Apply: Mix auto body filler (e.g., Bondo) per instructions, spread a thin layer with a plastic spreader—keep it level.
-
- Dry and Sand: Let cure (30 minutes), then sand with 220-grit, then 600-grit for smoothness.
-
- Paint: Touch up with matching paint and clear coat—follow Step 4 above.
7.2 Why Last Resort?
Filler hides, not fixes—use only if other methods fail.
Final Touches: Buffing and Polishing
Post-repair shine seals the deal.
Finishing Steps
-
- Polish: Rub polishing compound with a microfiber towel—smooths transitions and boosts gloss.
-
- Wax: Apply wax with a foam pad—protects new paint and repels water.
-
- Maintain: Wash monthly, wax quarterly—keeps repairs pristine.
-
- Upgrade: Ceramic coating (optional) adds years of durability—pricey but tough.
Why Finish?
Polishing blends repairs; wax guards against wear—skip it, and fixes fade fast.
Additional Insights
Why DIY?
Saving $200+ is huge—plus, you control quality. Shops may rush minor jobs.
Tools Cost
$30–$50 covers basics (sandpaper, paint, wax)—dent pullers or fillers add $20–$40. Reusable for years.
Limits
Deep dents, cracked paint, or structural damage need pros—DIY shines for small stuff.
Conclusion
Repairing small scratches and dents at home is empowering and wallet-friendly. With this guide—identifying damage, cleaning, buffing or painting scratches, and popping or filling dents—you’ll restore your car’s exterior like a seasoned pro. The right tools, a steady hand, and regular upkeep turn minor flaws into distant memories. Act early on damage, maintain that shine, and your car will look sharp without the body shop bill. Roll up your sleeves—your ride deserves it!