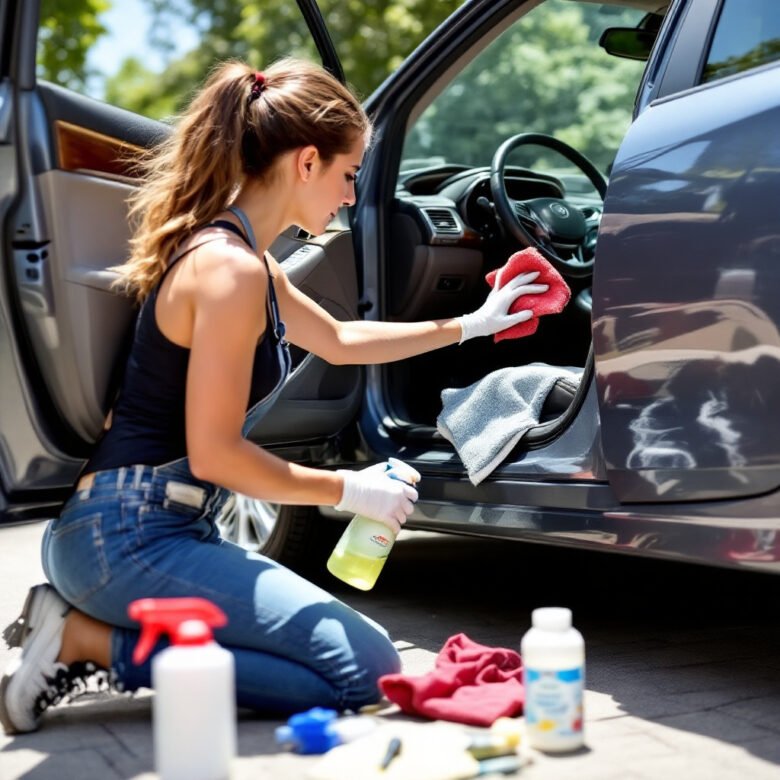
A spotless car interior isn’t just about aesthetics—it transforms your driving experience, boosts comfort, and even preserves your vehicle’s resale value. Professional detailing can cost $100 or more, but with the right tools, products, and techniques, you can achieve showroom-quality results at home for a fraction of the price. This step-by-step guide walks you through the entire process, from gathering supplies to banishing odors, ensuring every nook and cranny shines. Whether your car’s interior is fabric, leather, or a mix, you’ll learn pro-level tricks to make it look and feel brand-new.
Tools and Supplies Needed
Preparation is half the battle. Having the right gear ensures efficiency, protects surfaces, and delivers professional-grade cleanliness.
Cleaning Tools
-
- Vacuum Cleaner with Attachments: A powerful vacuum with a crevice tool and brush attachment tackles dust, dirt, and crumbs in tight spots and on upholstery.
-
- Microfiber Towels: Soft, lint-free, and absorbent—these are your go-to for wiping surfaces without scratches or streaks.
-
- Soft-Bristle Detailing Brushes: Perfect for vents, buttons, and crevices—choose varied sizes for versatility without harming delicate finishes.
-
- Toothbrush or Small Scrub Brush: Ideal for scrubbing stains on fabric or mats—opt for soft bristles to avoid abrasion.
-
- Steam Cleaner (Optional): A game-changer for deep-cleaning carpets and disinfecting upholstery with heat—no chemicals needed.
-
- Compressed Air Canister: Blasts dust from vents, seams, and hard-to-reach areas with precision.
-
- Cotton Swabs: Tiny but mighty for detailing gaps, grooves, and edges.
Cleaning Products
-
- All-Purpose Cleaner: Safe for plastic, vinyl, and dashboards—choose a non-toxic, automotive-grade formula.
-
- Glass Cleaner: Ammonia-free versions ensure streak-free windows and mirrors without damaging tints.
-
- Upholstery and Carpet Cleaner: Formulated for fabric seats and rugs—look for stain-lifting foam or spray.
-
- Leather Cleaner and Conditioner: A must for leather seats—cleaner removes grime, conditioner keeps them supple and crack-free.
-
- Interior Protectant: UV-blocking sprays or wipes shield plastic and vinyl from sun damage and fading.
-
- Disinfecting Wipes or Spray: Kills germs on high-touch areas like the steering wheel and door handles.
-
- Fabric Refresher: Neutralizes odors in upholstery—Febreze or similar works well.
-
- Odor Eliminator: Baking soda or activated charcoal bags absorb stubborn smells naturally.
Why It Matters
The right tools prevent damage (e.g., hard brushes scratching dashboards) and ensure thoroughness—cotton swabs reach where rags can’t. Quality products save time and protect surfaces long-term.
Step 1: Remove Trash and Loose Items
Start with a clean slate by clearing out clutter—trash and stray items make detailing harder and hide dirt.
How to Do It
-
- Check every corner: under seats, glove box, center console, cup holders, door pockets, and trunk.
-
- Toss wrappers, receipts, and junk into a trash bag.
-
- Collect valuables (keys, coins, sunglasses) in a container—don’t risk vacuuming them up.
-
- Remove larger items like gym bags or groceries temporarily.
Pro Tip
Keep a small trash bin in your car going forward—it cuts clutter and simplifies future cleanings.
Step 2: Vacuum the Interior Thoroughly
Vacuuming is the foundation of a clean interior, lifting loose dirt before deeper cleaning begins.
Steps for a Pro Vacuum
-
- Crevice Tool: Slide it between seat cushions, under seats, and along console edges to suck up hidden crumbs and dust.
-
- Floor Mats: Remove them, shake outside, then vacuum both sides—don’t skip the underside where dirt hides.
-
- Brush Attachment: Use on carpets and fabric seats to loosen embedded dirt—go slow for maximum lift.
-
- Pedal Area: Focus here—grit from shoes builds up fast, affecting pedal feel if ignored.
Pet Hair Hack
Rub a rubber squeegee or inflated balloon over seats to clump hair, then vacuum it up—brushes alone often smear it around.
Why It’s Key
Skipping this risks grinding dirt into surfaces during later steps, dulling finishes or staining fabrics.
Step 3: Clean the Dashboard and Console
The dashboard and console are focal points—keeping them pristine ties the interior together.
Cleaning Process
-
- Wipe Down: Spray all-purpose cleaner on a microfiber towel (not directly on surfaces—overspray can harm electronics) and wipe the dashboard, steering wheel, and console.
-
- Detail Tight Spots: Use a soft detailing brush to dislodge dust from vents, button edges, and seams—follow with a dry towel.
-
- Protect: Apply an interior protectant with a fresh microfiber towel in thin, even strokes—matte-finish products reduce glare better than glossy ones.
-
- Screen Care: For infotainment screens, use a screen-safe cleaner (or diluted alcohol) and a soft cloth to banish fingerprints.
Bonus Tip
Test protectants on a small spot first—greasy formulas can reflect sunlight, distracting you while driving.
Step 4: Clean Cup Holders and Small Compartments
These overlooked areas trap grime and sticky messes—cleaning them elevates the whole interior.
How to Clean
-
- Remove Inserts: Pop out rubber or plastic cup holder liners—wash with warm, soapy water, rinse, and air-dry.
-
- Scrub Residue: Use a damp cotton swab or toothbrush with all-purpose cleaner to tackle sticky spots—rinse the tool often.
-
- Dry Thoroughly: Wipe with a dry towel and let air circulate—wet compartments breed mold.
Why Bother?
Clean cup holders prevent mystery stains on your coffee cup—and signal a truly detailed car.
Step 5: Deep Clean the Seats
Seats endure daily wear—cleaning them right depends on their material.
Fabric Seats
-
- Apply Cleaner: Spray upholstery cleaner evenly—too much soaks in, too little misses stains.
-
- Scrub: Use a soft scrub brush in circular motions to lift dirt—focus on high-traffic areas like the driver’s seat.
-
- Wipe: Blot with a damp microfiber towel to remove cleaner and grime—repeat if stains persist.
-
- Dry: Open doors or use a fan—wet seats can mildew if left damp.
Leather Seats
-
- Wipe First: Use a damp microfiber towel to remove surface dust—don’t soak.
-
- Clean: Apply leather cleaner to a cloth, scrub gently (especially on stains), and wipe off with a dry towel.
-
- Condition: Rub in conditioner with a fresh cloth—let it sit 15 minutes, then buff off excess for a soft, non-greasy finish.
-
- Dry: Air-dry fully before sitting—wet leather marks easily.
Pro Tip
Test cleaners on a hidden seat spot—some formulas fade dyes or dry out leather.
Step 6: Clean Carpets and Floor Mats
Carpets and mats trap dirt and stains—refreshing them makes the interior pop.
Steps to Shine
-
- Shake Mats: Remove and shake vigorously outside—dislodge loose dirt before vacuuming.
-
- Vacuum: Hit mats and in-car carpets with the brush attachment—go over twice for deep grit.
-
- Spot Clean: Spray carpet cleaner on stains, scrub with a brush, and blot with a damp towel—avoid soaking.
-
- Dry: Hang mats in the sun or use a fan—damp carpets smell musty fast.
Why It’s Worth It
Clean carpets tie the lower interior together—stained mats undo all your upper-level work.
Step 7: Clean Windows and Mirrors
Streak-free glass boosts visibility and finishes the polished look.
Cleaning Method
-
- Spray Smart: Mist glass cleaner onto a microfiber towel—direct sprays drip onto upholstery or dashboards.
-
- Wipe: Use circular motions to lift smudges, then straight strokes to smooth out—hit interior and exterior sides.
-
- Buff: Polish with a dry microfiber towel for clarity—check from multiple angles to catch streaks.
Pro Tip
Clean on a cloudy day or in shade—sunlight dries cleaner too fast, leaving haze.
Step 8: Clean and Refresh Air Vents
Vents circulate air—and dust—throughout the car. Cleaning them improves air quality.
How to Do It
-
- Dust Off: Blast vents with compressed air or brush with a detailing brush—angle to reach deep slats.
-
- Disinfect: Lightly mist a disinfectant spray into vents (or run the AC with spray nearby)—it kills bacteria and freshens airflow.
Why It Helps
Clean vents cut allergens and odors—your nose will notice the difference.
Step 9: Remove Odors and Refresh the Interior
A fresh scent seals the pro-detailing vibe—banish stale smells with these tricks.
Odor Fixes
-
- Baking Soda: Sprinkle on carpets, wait 15–30 minutes, then vacuum—absorbs odors like a sponge.
-
- Activated Charcoal: Tuck a bag under seats for 24 hours—it pulls smells out silently.
-
- Air Freshener: Clip a subtle vent freshener or spray fabric refresher—avoid overpowering scents that mask issues.
Pro Tip
Address spill sources first—odor eliminators treat symptoms, not stains.
Final Touches: Organize and Maintain
Finish strong and keep it clean going forward.
Wrap-Up Steps
-
- Reorganize: Return essentials (maps, chargers) to glove box or console—keep it tidy.
-
- Stock Wipes: Stash disinfecting wipes for quick spill fixes or touch-ups.
-
- Routine Care: Vacuum weekly, wipe surfaces monthly—small habits prevent big messes.
Why Finish Right?
A clutter-free, maintained interior feels professional—and makes your next detail a breeze.
Additional Insights
Why Detail Yourself?
Beyond saving $50–$150, DIY detailing lets you control quality—pros sometimes cut corners. Plus, it’s satisfying to see instant results.
Time Investment
A full detail takes 2–4 hours—break it into chunks (e.g., seats one day, dash another) if needed.
Surface Tips
-
- Vinyl: Protectant is key—cracks fast in sun.
-
- Fabric: Scotchgard post-cleaning adds stain resistance.
-
- Leather: Condition quarterly—dry climates demand more.
Conclusion
Detailing your car’s interior like a pro is within reach with these detailed steps—clearing clutter, vacuuming thoroughly, wiping surfaces, scrubbing seats, shining glass, and banishing odors. Armed with basic tools and a few hours, you’ll rival any detail shop, leaving your car spotless, fresh, and inviting. Regular upkeep builds on this foundation, keeping grime at bay and your ride pristine. Take pride in the process—your car’s interior deserves it, and so does your driving experience.


