The alternator is a crucial component of your vehicle’s electrical system. It keeps the battery charged and ensures that all electronic accessories function properly. If your car exhibits dim headlights, a dead battery, or electrical issues, your alternator could be failing. In this comprehensive DIY guide, we’ll walk you through how to test and replace your alternator with step-by-step instructions and detailed explanations.
Signs of a Failing Alternator
Before testing your alternator, it’s essential to recognize the warning signs of failure:
- Dim or flickering headlights – The alternator powers the headlights, and a weak alternator may cause them to dim or flicker, especially at low RPMs.
- Warning lights on the dashboard – Most vehicles have a battery or alternator warning light (often shaped like a battery or labeled “ALT”). If this light comes on while driving, it could indicate a failing alternator.
- Strange noises – A failing alternator can make whining, grinding, or squealing noises. The whining sound often comes from a worn-out bearing, while grinding could indicate internal component damage.
- Dead or weak battery – If your battery keeps dying despite being new, the alternator might not be charging it properly. Frequent jump-starts may also be a sign.
- Electrical failures – Power windows, dashboard lights, radio, and other electrical accessories may work intermittently or not at all.
- Burning smell – A failing alternator can overheat, causing a burning rubber or electrical smell due to excessive resistance in the wiring.
If you notice any of these symptoms, it’s time to test your alternator.
How to Test Your Car’s Alternator
Testing your alternator can be done in three primary ways: the voltage test, the headlight test, and the battery disconnection test.
1. Perform a Voltage Test (Using a Multimeter)
This is the most accurate method to check your alternator’s health.
Tools Needed:
- A digital multimeter (with DC voltage setting)
- Safety gloves
- Safety goggles
- Vehicle owner’s manual (for battery location and specifications)
Steps:
- Prepare your vehicle – Park your car on a flat surface, turn off the engine, and engage the parking brake.
- Locate the battery – Open the hood and find the battery. Ensure there is no visible corrosion on the terminals.
- Set the multimeter – Turn the dial to DC voltage (20V setting).
- Measure battery voltage (engine off) – Connect the multimeter leads: red to the positive terminal (+) and black to the negative terminal (-). A fully charged and healthy battery should read around 12.6V to 12.8V.
- Measure alternator output (engine running) – Start the engine and take another reading. A properly functioning alternator should show a voltage between 13.8V and 14.8V.
- Test with accessories on – Turn on headlights, air conditioning, and radio, then recheck voltage. If it drops significantly below 13.5V, the alternator may be weak or failing.
2. Perform the Headlight Test
This is a quick way to check for alternator issues without tools.
Steps:
- Start the car and leave it in park.
- Turn on the headlights.
- Rev the engine to about 2000 RPM.
- Observe the headlights:
- If they get brighter when you rev the engine, the alternator is likely weak or failing.
- If they stay the same, the alternator is functioning normally.
- If they dim, the alternator is not charging properly.
3. Perform the Battery Disconnection Test (Not Recommended)
This method is risky and can damage your vehicle’s electronics.
Steps:
- Start the engine and let it idle.
- Disconnect the negative terminal of the battery.
- If the car dies, the alternator is not generating enough power.
Caution: Modern vehicles have sensitive electronics, and this test could damage the ECU. Use this only as a last resort.
How to Replace Your Alternator
If your alternator is faulty, replacing it can save you significant labor costs. The process is straightforward with the right tools.
Tools Needed:
- New alternator (compatible with your vehicle)
- Socket wrench set
- Serpentine belt tool or breaker bar
- Screwdrivers
- Battery terminal cleaner
- Anti-seize lubricant (optional)
- Safety gloves and goggles
- Vehicle service manual (for belt routing and bolt locations)
Steps to Replace an Alternator:
1. Disconnect the Battery
Safety first! Disconnect the negative battery terminal (-) to prevent electrical shock or short circuits.
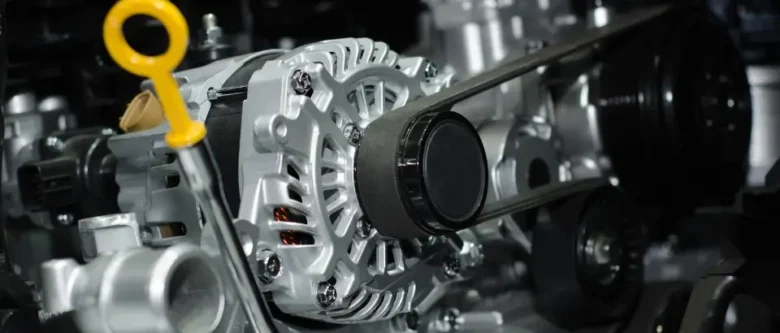
2. Locate the Alternator
Refer to your vehicle manual to find the alternator. It’s usually mounted on the front or side of the engine and connected to a serpentine belt.
3. Remove the Serpentine Belt
The alternator is driven by a serpentine belt:
- Use a serpentine belt tool or breaker bar to relieve tension on the belt.
- Carefully slide the belt off the alternator pulley.
- Take note of the belt routing to ensure correct reinstallation.
4. Disconnect Electrical Connections
- Unplug the electrical connector attached to the alternator.
- Remove the positive power cable secured by a nut. (Use caution, as this wire may still hold residual charge.)
5. Remove the Alternator
- Unbolt the alternator from its mounting bracket.
- Gently lift it out. If it’s stuck, wiggle it slightly to free it from its position.
6. Install the New Alternator
- Position the new alternator in place.
- Secure it with bolts and torque them to manufacturer specifications.
- Reconnect the electrical connectors and power cable.
- Reinstall the serpentine belt, ensuring proper tension and alignment.
7. Reconnect the Battery and Test
- Reconnect the negative battery terminal (-).
- Start the car and check if the alternator is charging properly.
- Use the multimeter to verify voltage between 13.8V and 14.8V.
Final Checks and Tips
- Inspect the serpentine belt – If the belt is worn, cracked, or loose, replace it to prevent future failures.
- Check for loose connections – Ensure all electrical connectors are securely attached.
- Look for warning lights – If the battery or alternator warning light remains on, recheck the installation or have the system scanned for error codes.
- Drive and monitor – After replacing the alternator, drive the car for a short distance and observe for any unusual noises or dashboard warnings.
Conclusion
Testing and replacing your car’s alternator is a manageable DIY task that can save you hundreds of dollars. By following this step-by-step guide, you can diagnose alternator issues and install a new one safely and efficiently. If you’re unsure at any point, consult your vehicle’s manual or seek professional help.
By taking care of your alternator, you ensure your car runs smoothly and reliably for years to come.